
Interactive Water Shader
Angelo Cabras (500801795)

1. Introduction
For this project I decided to make an interactive water shader. I chose to create a shader because I personally have never done anything with shaders in general and this would give me a solid five weeks to learn and mess around with them. The reason I went with water is because I’ve recently played some Assassin’s Creed games where the water really stood out to me and I wanted to create something similar. The interactive part was interesting to me as well because I heard that it can be quite tricky to create interactions with shaders.
1.1 Goals
In my original Research & Development proposal form I have set some goals and requirements I wanted to reach for the final product. My definition for a successful end product was an island surrounded by an ocean. Around the coast of the island waves should be moving towards the coast and there should be foam around the edges. Objects should also be able to float on water and a splash effect should be applied when a wave hits a rock or when a heavy object gets dropped. I’ve said that my end product should be applicable as a flexible, easy to import water shader that can be applied and adjusted to other projects.
1.2 Inspiration
As I mentioned earlier, the reason why I wanted to create a water shader in the first place is because I came across some really nice water in Assassin’s Creed games, AC: Odyssey and Valhalla in particular. The water in Odyssey has a very light blue and tropical look which is something I wanted to do as well. Another thing I liked about this water is that floating objects like lootable crates float really nicely in the water and go up and down according to the waves.


2. Process water visuals
I had decided for myself that I was going to spend half of the time on the water visuals and the other half on the behavior. Now to start off I had two different option on how to create a shader, either program it myself (Cg, HLSL) or use Unity’s visual scripting tool Shader Graph. I chose to go with Shader Graph because it seemed very modular and easy to add/remove/change things in it. To kick things off I had to inform myself about Shader Graph since I’ve never used it before. I started with a video by Brackeys (2018) that explained the basics of Shader Graph. This thought me the basics on how to create a new shader, add new nodes and how the input and output of those nodes work. It’s where I also found out the the Unity project needs to be in either URP or HDRP for it to work.
2.1 Getting started in Unity

After creating my URP Unity project I made a sample island with the terrain tool. Since I knew that ocean waves will look bad if a plane has few vertices, I created a custom plane in Blender with lots of subdivisions and added it to my scene.
From here I simply had no idea what the next steps would be to create a water shader so I went on YouTube and came across a video by Unity (2020) that was about creating a water shader using Shader Graph. Of course I didn’t just go for the first solution available so I just watched a bunch of videos out there. A video about stylized water by Binary Lunar (2020) also stood out me. What I’ve noticed is that the general technique to render water is generally the same.
2.2 Water color

Like in Assassin’s Creed Odyssey, there’s a clear difference between the color deep and shallow water. To recreate this effect I had to use the Scene Depth node which allows us to use to z-buffer of the camera. When subtracting the alpha of a fragment based on a “depth” value, an effect can be created where the place becomes more transparent when there’s an object underneath the plane.
The next step would be to give those two part of the plane different colors and make them have transparency so you can see the terrain underneath the plane. I accomplished this by lerping between two different color variables (deep & shallow) based on the output of the depth detection discussed earlier. I also added an extra multiplier for the depth detection so it isn’t as strong but fades slowly instead. The output of the lerp was not only used for the base color of the pixel, but also for the alpha.


2.3 Animating water
To make the water move without any sort of vertex displacement, a trick can be used where two normal are moving in opposite directions based on time. For this I used a time node, a tiling and offset node, two sample 2D textures and an adjustable normal strength node to change how clear the normal maps display.

The time node is divided by a positive and a negative amount to make the normal maps move in opposite directions. The tiling of the normal map determines how often the texture is repeated over the object. After passing both the normal maps to the strength node the output goes to the normal of the pixel shader. The result can be seen below:


As you can see the water is starting to look decent but it is not reflecting any light. To do this I simply adjust the smoothness value of the pixel shader. which looks like this:


2.4 Vertex displacement
Since the current water doesn’t actually move I had to do some sort of vertex displacement to create actual waves on my plane. Waves can be created in multiple ways.
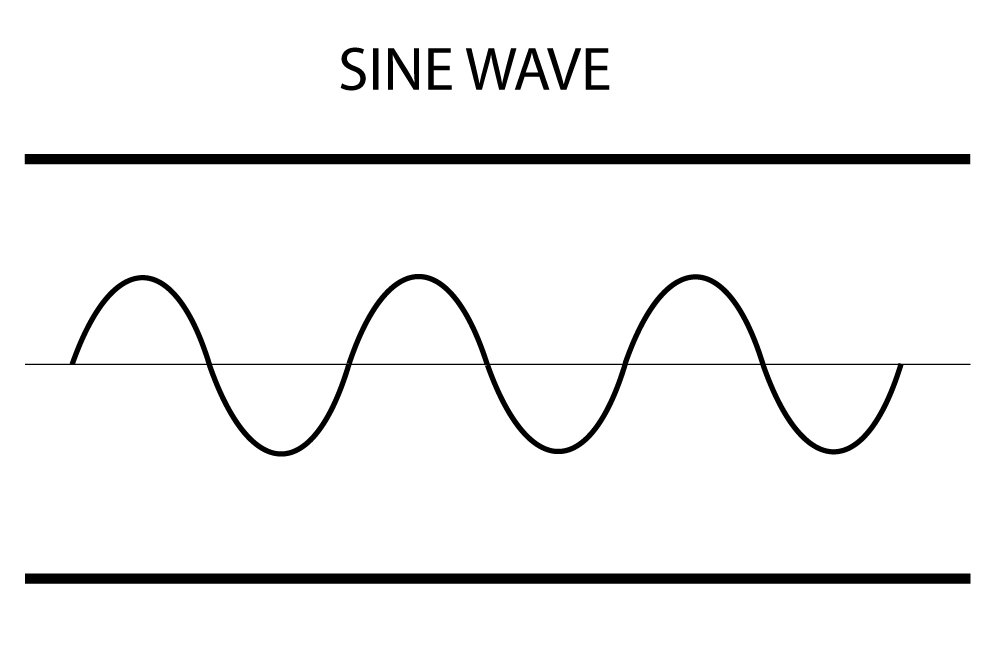
A sine wave can be used to create waves in a simple way. The downside of this is that the waves look very repetitive and directional.
/dotdash_Final_Sine_Wave_Feb_2020-01-b1a62c4514c34f578c5875f4d65c15af.jpg)
Sine waves can also be stacked on top of each other to make them look more detailed.

This fixes the issue of it looking very repetitive if done multiple time but since I’m using a single plane around the island it would look odd because it is directional.
The next option I looked into was Gerstner waves. These waves look a lot more realistic than sine waves but are also harder to implement. Since I also wanted to do water behavior I decided to not go for this method because it could complicate things. I definitely wanted to implement this at a later point.

The last method I came across was using perlin noise to generate waves. This method is easy to implement and creates decent looking waves. I settled for this option with the intent to later switch to Gerstner waves.

To create waves based on perlin noise in Shader Graph I simply used the gradient noise node with a displacement modifier and an offset based on time and then used it as input for the green channel. The green channel gets used for the Y-coordinate and that is the direction we want our waves to move in. I then used the output to change the vertex position.

2.5 Coast foam
Like in real life (and AC: Odyssey) ocean waves break up into foam along the coast. I wanted to recreate this effect for my own shader as well. Just like the deep and shallow water, depth can be used to detect the edges of the island (and other objects floating in the water). After just using the depth detection and a foam color the result was a white outline along the coast. This is the result I wanted but it still looked odd because it was just a solid color.

To give the coast foam some texture I once again used a noise map. I then use a step node. The step node can return either a one or zero. I then use the noise map the determine whether a pixel should be foam or not if it is within the depth range. Finally I lerp between the deep/shallow water color and the foam color based on the foam “shape” to create the following result:

2.6 Wave foam
Just like on the coast foam should also form on top of waves. Sadly this is one if the things that didn’t work out for me. I had set a deadline for myself for when I should stop working on the appearance of water so I had time left for water behavior and because I was already way past that deadline I decided to not completely finish it. I got to a point where foam layer did appear on top but I couldn’t get the look quite right. The way I got it to work was by using a smoothstep node. I used this node to only make the foam visible above a certain height. This creates the desired effect of foam only appearing on top of high waves. besides the smoothstep node I also used the noise node to give the foam some texture.

As you can see, foam now appears on top of the waves. Further tuning would be required to make the foam look right. For the rest of the project I left this part of the Shader Graph disabled.

3. Process water behavior
After being done with water visuals I started looking into buoyancy since I wanted objects to float. After going through some videos like “Buoyancy with rigidbodies” by A Beginner’s Dev Vlog (2021) and “How to setup water” by Tom Weiland (2020) I realized that doing buoyancy would be hard if the waves are done in the vertex shader.
3.1 Buoyancy
After moving away from doing waves in the vertex shader I had to replace them by manipulating the mesh of the ocean plane. The way I did this is the same as in the shader, with perlin noise:
for (int i = 0; i < vertices.Length; i++)
{
    float posX = (vertices[i].x * scale) + (Time.time * waveSpeed);
    float posZ = (vertices[i].z * scale) + (Time.time * waveSpeed);
    vertices[i].y = Mathf.PerlinNoise(posX, posZ) * waveHeight;
}

mesh.RecalculateNormals();
mesh.vertices = vertices;
The code here is all executed by the CPU so it IS less performant than the shader. Now that the water is back to the way it used to be I moved on to floating objects. For this I looked up how objects should behave when floating on water.
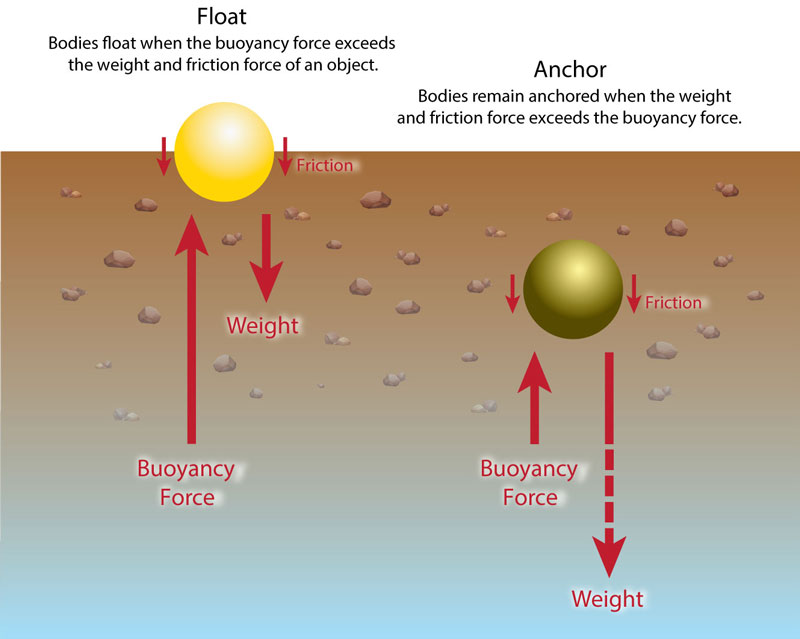
As seen in this picture, there is a couple of variables at play. First we have gravity that is pushing down the object in to the water. Then we have the buoyancy force to determine how “floaty” an object is. Friction is the resistance that the object encounters when it collides with the water surface and the weight can make object sink if set greater than the floating power.
To tackle this in code I gave objects a script that has two different states. A state for being above water and for being underwater. We do this because the floating force should not apply when an object is above water. We also want different drag values for each state since we dont want object to be bouncy and “spinny ” when floating on the water surface. When an object is in the underwater state we simply apply an up force multiplied by the floating power on the rigidbody of the object.
This code works well if the water had no form of displacement at all. Since we are using perlin noise to generate waves, the objects do not move up and down nicely with the waves. When going back to the wave script I realized that the waves get generated in a consistent way. The x and z positions, time and some wave multipliers get used in a consistent way, so it would also be possible to get the height of a wave at a given position.
public float GetWaveHeight(Vector2 position)
{
    float posX = (position.x * scale) + (Time.time * waveSpeed);
    float posZ = (position.y * scale) + (Time.time * waveSpeed);
    return Mathf.PerlinNoise(posX, posZ) * waveHeight;
}
After implementing this I simply calculated the difference between the floating object’s height and the wave height to decide weather underwater or normal physics should apply. The resulting code for buoyancy:
float waveHeight = waterManager.GetWaveHeight(gameObject.transform.position);
float difference = gameObject.transform.position.y - waveHeight;

if (difference < 0)
{
    rb.AddForceAtPosition(Vector3.up * floatingPower * Mathf.Abs(difference), transform.position, ForceMode.Force);
    if (!isUnderwater)
    {
        isUnderwater = true;
        rb.drag = underwaterDrag;
        rb.angularDrag = underwaterAngularDrag;

    }
    else if (isUnderwater)
    {
        rb.drag = drag;
        rb.angularDrag = angularDrag;
        isUnderwater = false;
    }
}
4. Conclusion & Looking back
Looking back at my original requirements and the end result I think I got really close to what I originally wanted. The two missing things are waves moving towards the coast around the edges of the island and water creating a splash effect.
I actually spent some time on creating a splash effect and I got pretty close but I didn’t feel like it was in a state to discuss on this blog post. I basically got a particle system that gets instantiated on contact with the water surface. The size of the particle was also dependent on the velocity of the object but it just wasn’t in a finished state.
While working on the buoyancy code I also realized that I still could’ve done the buoyancy calculations if the waves were still done in the vertex shader, although this would be a little with Shader Graph. If I had programmed the shader myself I could’ve made the same exact wave calculations as the buoyancy calculations and that would pretty much solve the problem. I only realized this when I noticed that the objects don’t really have to interact with the mesh of the ocean.
If I were to continue on this project. I would definitely look into better wave generation, especially the Gerstner waves. I would also continue to work on the foam layers and try to make those look right. Finally I could also improve the buoyancy since right now it only uses a single position, meaning that big object behave weird.
5. Gerstner waves
After handing in my interactive water shader I was given the opportunity to replace the current wave system which used perlin noise, with the more natural Gerstner waves.
I started by disabling the code that manipulated the mesh of the plane that generates waves. After looking up information about Gerstner waves, I came across the following picture:

Since my knowledge of math doesn’t go that far I looked up videos to see if other people implemented these waves. Thankfully I came across a video by Zicore (2020), that explains how the the formulas can be broken down and how they can be applied Shader Graph.
Each of the formulas in the above picture show the displacement for a certain axis.


Each of these formulas use a variable theta (θ) which represents an angle, θ can be seen in each of the formulas for all axis. For the Gerstner waves this can be calculated with:

In order to calculate theta, the frequency needs to be calculated. This can be done with the following equation, which is used in the above formula:

5.1 Implementing in Shader Graph
Since the Gerstner waves require two different formulas I had to use Shader Graph’s “sub-graphs” to keep everything organized and to create an expected input/output.
I started off with the frequency sub-graph. Frequency takes in 3 different inputs which are gravity, direction and depth. These can be used to change the shape and direction of the waves. The output of the sub-graph is a float.

The second sub-graph theta can now be created since that requires the amplitude in its calculation. Theta uses the X and Z-axis of the direction and position as inputs. It also uses the frequency sub-graph and its needed inputs. Finally, there’s also a time and phase input. The time input will simply be used with the current game time so that the waves will move and the phase input can be used to give the waves an offset. The output of the theta sub-graph is also a float.

With these two sub-graphs in place, the final sub-graph, the actual Gerstner wave formula can be created. In this sub-graph the output of theta (and all of its inputs) will be used to calculate the X, Y and Z displacements for the vertices. The only newly added variable here is the amplitude which determines the height of the waves. The output of the sub-graph is a vector 3.

Now all that was left is adding the Gerstner wave and its needed inputs to my main water shader graph. For the time input the game time is used multiplied by a time scale variable that can be set in the shader. For the position, the absolute world position is used. This is done so that the water can be tiled. phase, gravity, depth, direction and amplitude are all inputs that can be set in the shader settings. Before the output of the Gerstner sub-graph gets linked to the vertex position it is first converted back to the object position and added to the absolute world position.
After tuning the shader settings I managed to get my desired result:

5.2 Updating buoyancy
After updating my wave calculations, I will also have to update the buoyancy logic. Because my buoyancy script uses a GetWaveHeight() method from the water manager script I wrote, I only need to update that function and the rest of the calculation can stay untouched.
float waveHeight = waterManager.GetWaveHeight(gameObject.transform.position);I started off by getting the variables directly from the shader.
        float gravity = material.GetFloat("Gravity");
        Vector3 direction = material.GetVector("Direction");
        float depth = material.GetFloat("Depth");
        float timeScale = material.GetFloat("TimeScale");
        float phase = material.GetFloat("Phase");
        float amplitude = material.GetFloat("Amplitude");
I then calculated the same frequency and theta I used at shader level by looking up the mathematical function of each node I used in the shader graph.
        float frequency = Mathf.Sqrt((direction.magnitude * gravity) * ((float)Math.Tanh(direction.magnitude * depth)));
        float theta = ((direction.x * position.x) + (direction.y * position.y) - (frequency * (Time.time * timeScale)) - phase);
This code can look a little bit confusing because it seems to use the Y-axis for theta but it is actually using the Z-axis. This is because my method takes in a Vector2 which only contains the X and Z. Since I only need the Y-position to determine the height for the buoyancy objects, I only calculate the Y-pos in the Gerstner wave formula which is Mathf.Cos(theta) * amplitude;

6. Sources
3D Stylized Water with Refraction and Foam Shader Graph – Unity Tutorial. (2020, September 19). YouTube. Retrieved April 11, 2022, from https://www.youtube.com/watch?v=MHdDUqJHJxM
Buoyancy. (2021, March 22). ACO Passavant. Retrieved April 11, 2022, from https://www.acopassavant.com.au/product-support/specification-considerations/buoyancy/
Buoyancy with Unity Rigidbodies – Part 1 / Planar Buoyancy. (2021, April 30). YouTube. Retrieved April 11, 2022, from https://www.youtube.com/watch?v=iasDPyC0QOg
FORCE FIELD in Unity – SHADER GRAPH. (2019, April 28). YouTube. Retrieved April 11, 2022, from https://www.youtube.com/watch?v=NiOGWZXBg4Y
G. (2020). Perlin Noise Animation. UnityList. https://unitylist.com/p/ywk/Perlin-Noise-animation
Making a Water Shader in Unity with URP! (Tutorial). (2020, July 7). YouTube. Retrieved April 11, 2022, from https://www.youtube.com/watch?v=gRq-IdShxpU
O’Reilly, J. (2018, October 5). Art That Moves: Creating Animated Materials with Shader Graph. Unity Blog. Retrieved April 11, 2022, from https://blog.unity.com/technology/art-that-moves-creating-animated-materials-with-shader-graph
OCEAN shader with Unity Shader Graph! (2019, May 13). YouTube. Retrieved April 11, 2022, from https://www.youtube.com/watch?v=FbTAbOnhRcI
V. (n.d.). GitHub – Verasl/BoatAttack: Demo Project using the Universal RP from Unity3D. GitHub. Retrieved April 11, 2022, from https://github.com/Verasl/BoatAttack
How to implement Gerstner Waves with Shader Graph in Unity. (2020, 2 augustus). YouTube. Geraadpleegd op 28 juni 2022, van https://www.youtube.com/watch?v=Awd1hRpLSoI


